Walkthrough: Figma Integration
This walkthrough shows how to use hardware to control UI in Figma by using the blokdots Figma integration.
Because of technical limitations set by the Figma API, there are certain limits to what is possible to do with this integration: The communication works only from blokdots to Figma, but not the other way around (you can’t trigger something on your hardware when a button is clicked in Figma). It is also only compatible with the canvas view of Figma, not its prototype preview. We’d be thrilled to add more advanced functionality to the integration, but unfortunately, these limits are set by Figma.
Prerequisites
This example assumes you are somewhat familiar with both Figma and blokdots.
Necessary Components
For this example you are going to need these components in addition to your board:
All of the components are included in the Grove Beginner Kit.
Project File & Assets
This file contains the finished project – if you get stuck along the way, feel free to download it and take a look!
Step by Step
1. Installing the blokdots plugin in Figma
The first thing you need to do to be able to control elements of the Figma canvas using hardware is to install the blokdots Figma plugin. Simply click the “Try it out” button on that page. However, you must make sure to use the Figma Desktop App when running the plugin: The plugin does not work in the browser version of Figma, only in the Desktop app.
Now you can copy our Figma community file so you concentrate on learning how to set up the blokdots integration, rather than worrying about naming layers.
2. Adding the Figma integration to your project in blokdots
Next, open a new project in blokdots. In the bottom corner of the Live View, there is a button labeled “Add Integration”. Click that button and select Figma to add the Figma Integration. After adding it, you can see a red indicator in its slot, that says that there are no connections. Let’s change that by switching to Figma and running the blokdots plugin there!
2. Exposing the Figma layers to blokdots
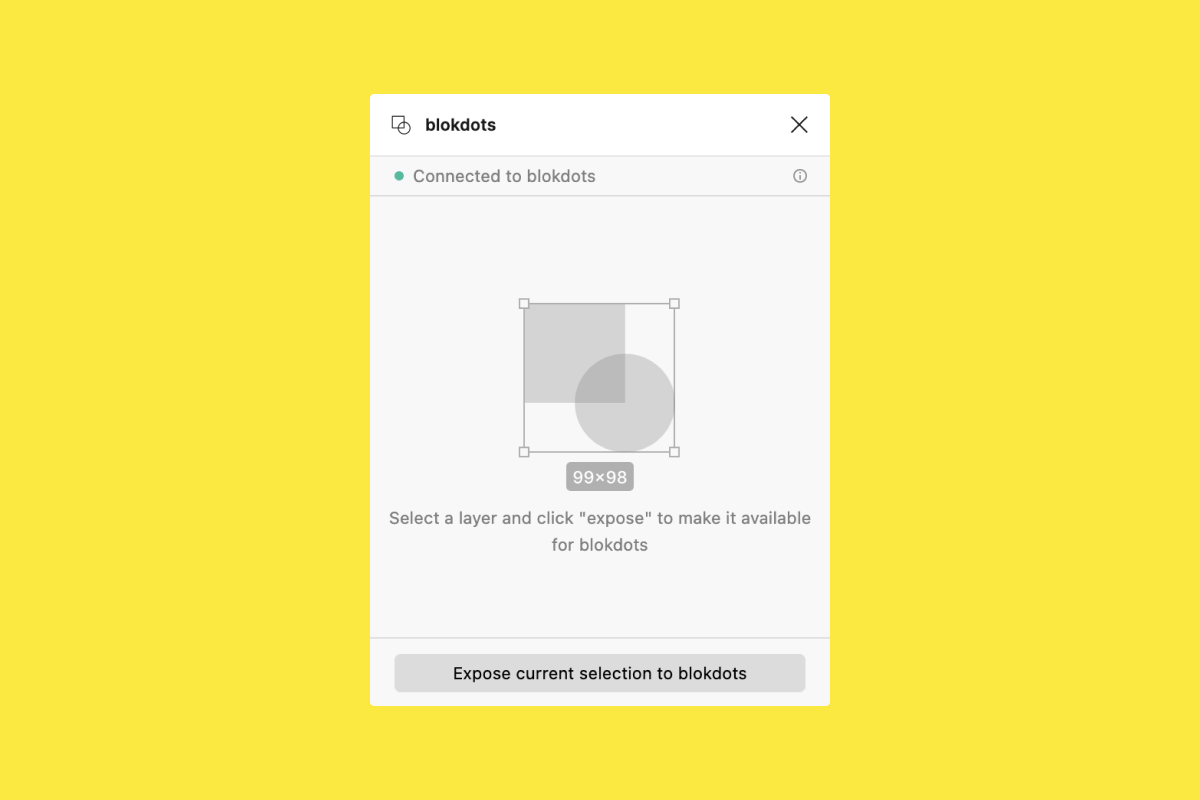
In the Figma file, right-click the canvas, navigate to Plugins and click blokdots. If blokdots is open and the Figma integration is enabled, the plugin window should look like this. If it doesn’t, make sure you didn’t jump over that last step, or try restarting both blokdots and Figma.
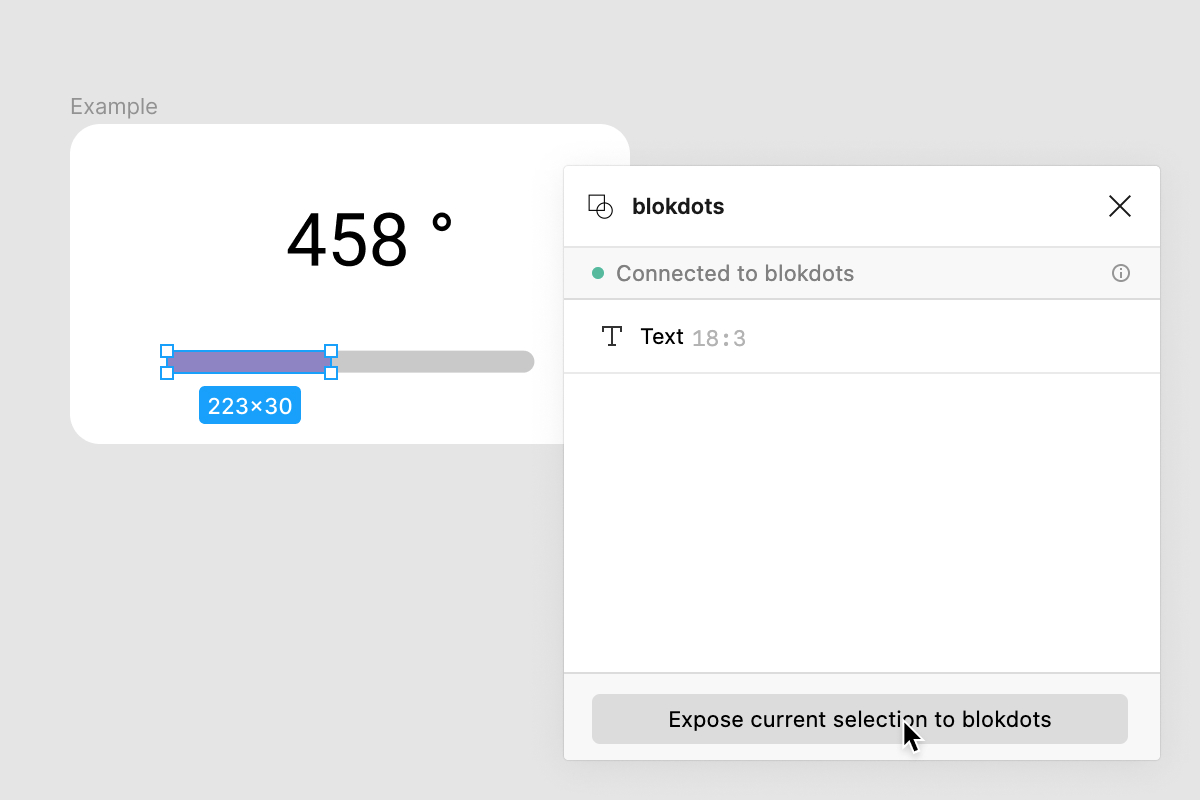
For blokdots to be able to manipulate a layer, that layer must be exposed by the plugin. So let’s select the layers we want to be able to control from blokdots, and press the button labeled “Expose current selection to blokdots”. In the case of this example, first, select the rectangle layer named “Bar” and press the button. Then select the text layer named “Text” and press the button again. Both layers will now appear in the blokdots plugin window. Do not close the plugin window – the integration only works as long as the plugin is active.
3. Creating the blokdots project
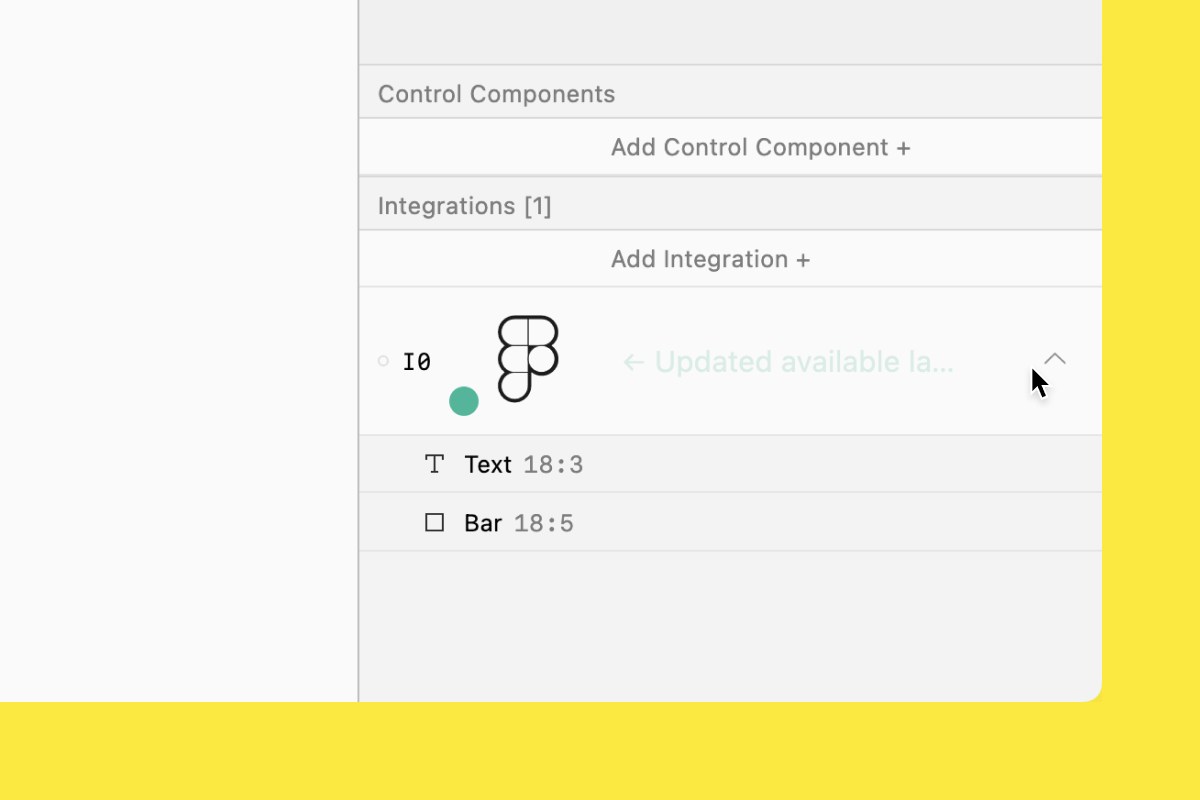
Let’s switch back to blokdots. Immediately we can see, that the indicator in the slot of the Figma integration has turned green and a connection to Figma is established. To check if the exposure of the layers did work, click the arrow on the right side of the slot. A panel appears in which all the currently exposed layers are listed. You should be able to see both the layers that you selected in the plugin.
Next, we set up the hardware components we want to use. In the Live View click the button labeled “Connect A New Component” and select “Potentiometer”. The Wizard recommends the slot A0. If you are using the Grove Beginner Kit and didn’t break out the components, the Potentiometer is already connected to this slot and you don’t need to do anything. Otherwise, connect the component to the slot A0 on your board. Next switch to the Project and click the “use” button for the Potentiometer on the left side of the window. This tells blokdots that we are going to use this component in our project.

Now we are ready to start building the logic for our protoype.
Our goal is to use the progress bar in the Figma file to display the current position of the Potentiometer. This is not a single “If … then …” kind of behavior, but a continuous relationship – whenever the Potentiometer changes, the bar should change as well. To program this behavior we need a Relationship Card. In the Project, click the button labeled “Map … onto …” to add a Relationship Card.

These kinds of cards are filled out step-by-step, just like the “If … then …” cards. In our case, we want to map our Potentiometer onto the width of the “Bar” layer in Figma. Therefore we select “Map Potentiometer from 0 to 270°” – that’s the full range of values of the component. In the second part of the clause, we select “Figma“ and then pick the layer and property we want to change. Finally, we add the range of values that we want the property to be set to, based on the current value of the Potentiometer. In our case we want to go from 0px up to 500px. So in the end the second clause says “Onto Figma layer Bar width from 0 to 500”.
4. Sending to Figma
Now let’s see our prototype in action. Click “Run Project” in the top left corner of the window, then switch to Figma. Make sure the plugin is running, then start turning the Potentiometer on your board. You should now be able to change the width of the rectangle with your Potentiometer.
If it doesn’t work, make sure your board was recognized by blokdots, by checking whether the status in the Live View is “ready” and seeing if the visualization in the Live View responds when you turn the Potentiometer. Then check if the project is really running. Finally, make sure the blokdots plugin is open and connected to blokdots.
If the performance is a bit choppy and not as smooth as you’d like, make sure that the blokdots window is not in the background. This means it shouldn’t be minimized or completely covered by another window, but be partly visible all the time.
We can use the same logic to manipulate any property we want. For example, try changing the color of the bar based on the rotation of the Potentiometer!
Finally, let’s use a little hidden feature in blokdots to build something cool: Create a new “If … then …” card, then set it to “If Potentiometer is changing, then Figma should set text of Text to {{value}} °”. By writing this weird-looking placeholder, {{value}} °, in the text field, we tell blokdots to always use the current value of the component that is triggering the card. This means we are now able to display the current value of the Potentiometer in Figma!
Your final result should look something like this:

Now hit play again and you have a little sensor dashboard prototype! Maybe next you could try to map the temperature sensor instead of the potentiometer and create a visual thermometer for your room.