Hardware
blokdots is a tool for hardware prototyping, so to build something with it, you are going to need some hardware. More specifically, you’ll need a microcontroller board and some components, like sensors (input) and actuators (output).
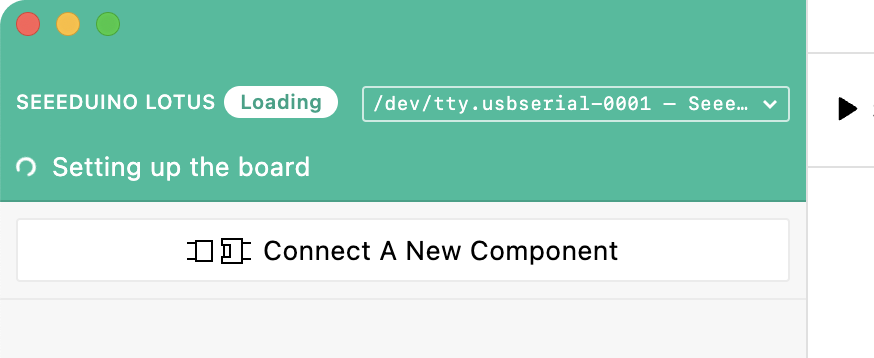
Currently, blokdots supports only original Arduino boards and the Seeduino Lotus. You can find a list of supported boards below.
For sensors and actuators we strongly recommend the Grove system. It comes with ready-to-use components that can be connected using a single type of wire in a plug-and-play style — this means no soldering or knowledge of electronic wiring is necessary. See below for an introduction to the system.
If you just want to get started right away and need a board and a handful of fun components, we recommend the Grove Beginner Kit.
Supported Boards
These boards are currently supported by blokdots:
You might have to install an additional driver before the Seeeduino Lotus is recognized by blokdots.
If flashing some older boards does not work, then you might need to press the "RESET" button on the board while plugging it in.
Grove
Grove is a system created by Seeed Studio. It removes the need for manual wiring and soldering by introducing a single type of wire for all components. The components are ready-to-use, so you just plug them into the slot and they work right away. This is great for beginners and makes hardware prototyping much faster for more experienced users as well.
To use the Grove system, you need either a Seeeduino, which is a board that has Grove slots already integrated, or a Grove Shield, that you plug into an Arduino board to add Grove slots.
Grove Beginner Kit
The Beginner Kit has everything you need to start. It comes with a Seeeduino Lotus, which is a board with Grove connectors, 10 components, Grove cables, and a USB cable. It costs around 20 US$ (price subject to change due to external distributor). You can order it here.

In this kit are included the following components:
- Button
- Rotary Potentiometer
- Brightness/Light
- Sound
- LED
- Buzzer
- Accelerometer
- Air Pressure
- OLED Display
Be aware: The Temperature & Humidity Sensor included in the Grove Beginner Kit is not supported by blokdots yet.
Grove Shield
A Grove Shield is a piece of hardware that you put on top of your regular Arduino. You can then connect Grove components to the slots on the Shield. If you already own an Arduino, you should consider adding a Grove Shield to start using the Grove system. Below you can see an Arduino Uno with a Grove Base Shield on top.

Set the little switch at ”VCC” (if your shield has one) to ”5V” to allow every component to function properly.
Here you can find the shields for some of the boards:
- Grove Base Shield for Arduino Uno and Arduino Leonardo
- Grove Mega Shield for Arduino Mega
- Grove Nano Shield for Arduino Nano
- Arduino MKR Connector Carrier for Arduino MKR WiFi 1010
Grove Components
There are hundreds of components available in the Grove system. Before purchasing any, please take a look at the list of components currently supported by blokdots. On the bottom of the detail page for each component, there is a link to the corresponding Grove component.
Using blokdots without Grove
blokdots works with regular components built for microcontrollers as well. The name of the Arduino pins hereby resemble the Grove slots, so for example what would have been Slot D4 is pin 4 on the Arduino board. Take a careful look at the documentation and select components matching the same specifications as their Grove counterparts.
Supported Components
To learn more about the components and the interactions supported by blokdots, take a look at the components section of our documentation.
If there is a type of component that you would like to use in prototypes but that isn’t available, feel free to send us an email to support@blokdots.com so we can add it to our list of requested components.
Slot Types
In general, four slot types are currently supported: digital, analog, pwm, and I2C. It is important to know them because components only work when connected to the right kind of slot.
- digital — this is the most basic slot. It only can communicate with “on” or “off”. It works in both directions, in and out. On your board, these slots are labeled
D[Number]. - analog — analog slots are only able to read values, so only “in” components like sensors get plugged into these slots. In comparison to digital slots, an analog slot can read values between
0and1023. This is a relatively wide range, that allows you to get detailed readings from your sensors. On your board, these slots are labeledA[Number]. - pwm — this is a technology to transform slots that can only communicate digitally to behave more like analog slots, but only in the “out” direction. Therefore these slots have more granular output settings and can send values between
0and254. This makes it possible to control the components connected to this slot in greater detail. For example, an LED on a regular digital slot can only be on or off, but an LED connected to a pwm slot can be set to a specific brightness. Unfortunately on the Grove Shield, these slots are not clearly marked. They do however still exist! E.g. on an Arduino Uno Grove Shield, the pwm slots are:D3,D5, andD6. In blokdots, these slots are marked by a “pwm” label. - I2C — this is a serial communication connection that allows for more complex data handling. Only very few components actually use this connection. You can think of it as a USB device that you simply plug into your computer. That also is the reason why you do not need to specify which of the different I2C slots on your Arduino you are using. At the moment blokdots only supports using a single I2C component at a time due to technical limitations. On your board, these slots are labeled
I2C.
Components only work when they are connected to the right kind of slot. When you set up your components in blokdots using the connection guide, blokdots will show you which slots are compatible with this component, so you don’t have to worry about it.
You can also take a look at the components section of this documentation and check out the detail pages for the individual components to see which component requires which kind of slot.
Firmata Firmware
Firmata is a software that runs on the Arduino board. It implements a communication protocol that makes it possible for blokdots to communicate with the Arduino.
So for blokdots to work, Firmata must be loaded onto the Arduino board. Once you start blokdots and plug in your Arduino for the first time, blokdots loads Firmata onto the board automatically, so usually you do not have to worry about that. A small green indicator at the top of the Live View informs you when this process is happening.
To install Firmata without the blokdots software, open the Arduino IDE and go to File › Examples › Firmata › StandardFirmataPlus, and flash this on your board.