ProtoPie Connect
#Description
A component that allows your hardware prototype to communicate with ProtoPie Connect. It behaves similarly to the SignalTower.
This component only works with ProtoPie Connect, available in ProtoPie’s Pro and Enterprise plans. Take a look at the ProtoPie Player Connection to connect blokdots and ProtoPie without using ProtoPie Connect.
#Links
#Functions
#Using the ProtoPie Connect integration
Our ProtoPie integration enables you to control your ProtoPie prototype with your blokdots prototype and in the other direction as well!
#How the ProtoPie connection works
In order to let blokdots talk to ProtoPie we’re making use of the messaging feature built into ProtoPie via the Send / Receive triggers. It’s a nifty feature that lets different prototypes talk to each other. With the help of ProtoPie Connect we can tap into the messaging system and exchange messages between blokdots and ProtoPie.
If you want to play around a little more with it, take a look at the ProtoPie Connect component in blokdots. The orange message field in blokdots corresponds to the Message field in the Send/Receive trigger in ProtoPie.
When you use ProtoPie Connect for the Then action of any input capable hardware component, the integration will send the message and will also try to send a corresponding value with the message. I.e. if you use the ProtoPie Connect component with a potentiometer you will get the values from 0 to 1023 that you receive from the potentiometer attached to the message. You don’t need to do anything with the value in ProtoPie, but you can.
For the return route – sending messages from ProtoPie to blokdots – you can use messages to trigger behavior on the If…then cards or if you want to use a value from ProtoPie to fade an LED in and out, you can use a Map…onto card to map the incoming value to the hardware component in blokdots.
#Create your own interactions
You can experiment with what’s possible by creating your own messages to be send and received. Best to keep the messages short, i.e. “ToggleLED” is better than “Toggle the LED light on or off”.
#The ProtoPie live slot
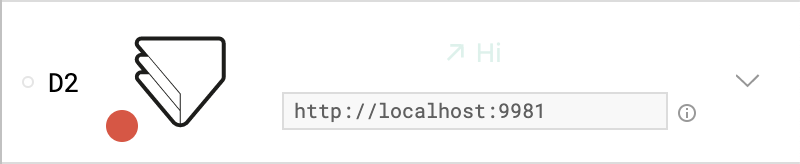
Once you selected the ProtoPie Connect component component in the Live View you will see the slot shown above. If blokdots is able to connect to the ProtoPie Connect software—so if the software is up and running—the little connection indicator at the bottom left of the ProtoPie icon should turn green.
If your ProtoPie Connect server should not be at the default location, e.g., it is not running on your computer but on someone else's, then you can simply change the address in the field filled with http://localhost:9981. Usually, this address should work with your setup.
Above the text field and if expanded, you can see the last communication between ProtoPie and blokdots. It behaves similarly to the connection between Signal Tower components.
#ProtoPie to blokdots
In ProtoPie Studio:
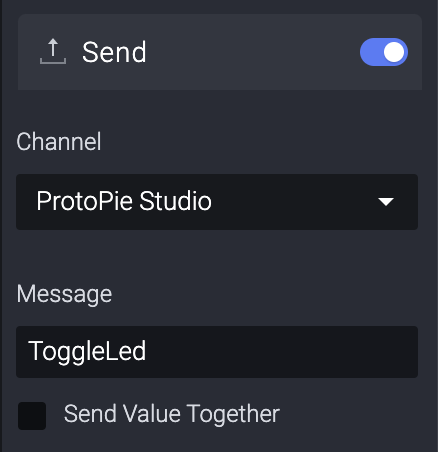
- Configure a trigger and use the “Send” response.
- Select “ProtoPie Studio" as the channel.
- Enter the message to be sent.
- Optional: Choose a value to be sent with the message
In blokdots:

- Create a new Card and select the ProtoPie Connect component. It should be set to "receiving".
- Enter the message in the orange input field. It needs to match the message configured in ProtoPie exactly.
- Define the Then reaction in the card by adding a component and selecting what it should do.
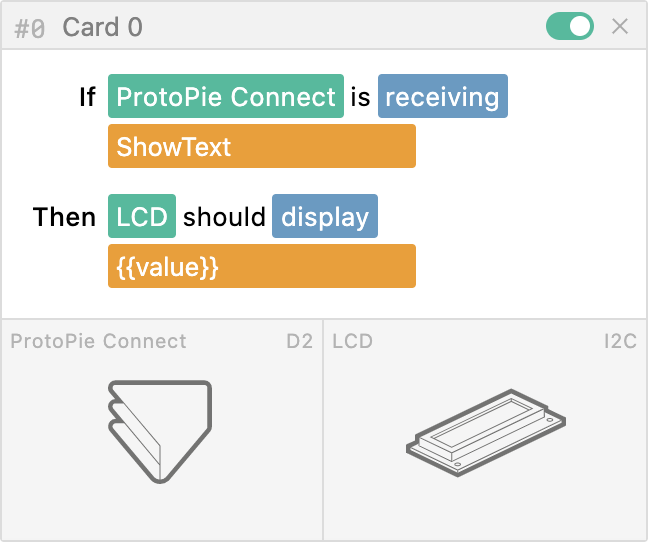
To use the message value as a string, you can access it via {{value}} in a text input field, e.g. when you want to send a message from ProtoPie to an LCD module, it would look like this ↑.
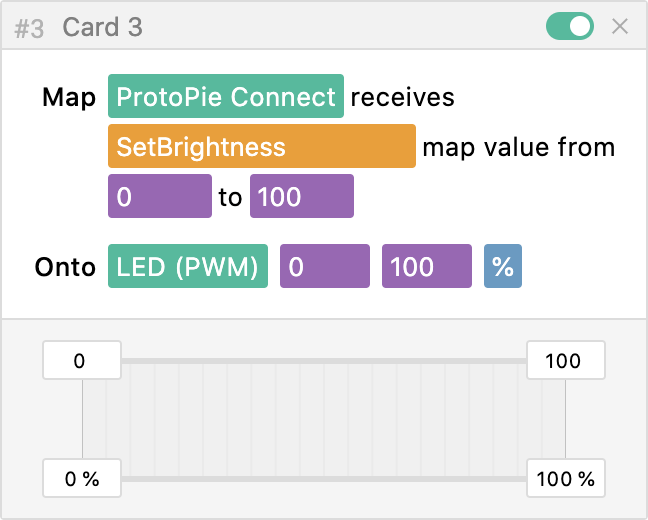
To use numerical values sent with messages, use a Mapping Card to set, e.g., the brightness of an LED or the movement angle of a servo motor.
#blokdots to ProtoPie
In blokdots:
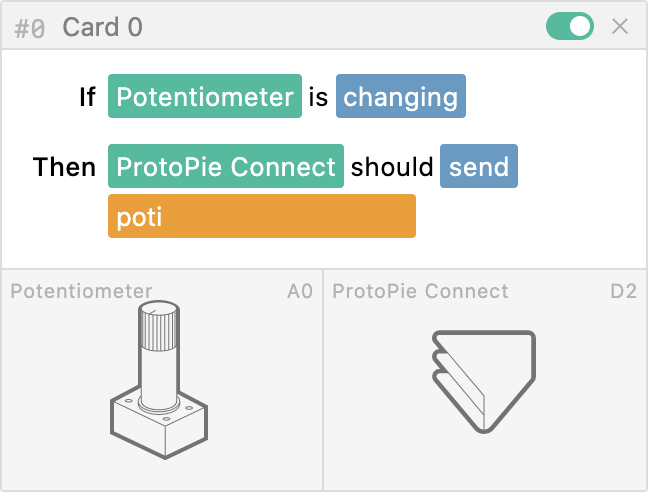
- Create a new card with an input component, i.e. a button, potentiometer or another sensor you have available
- Use the ProtoPie Connect component for the Then reaction
- Enter the message to be sent in the orange input field
In ProtoPie Studio:
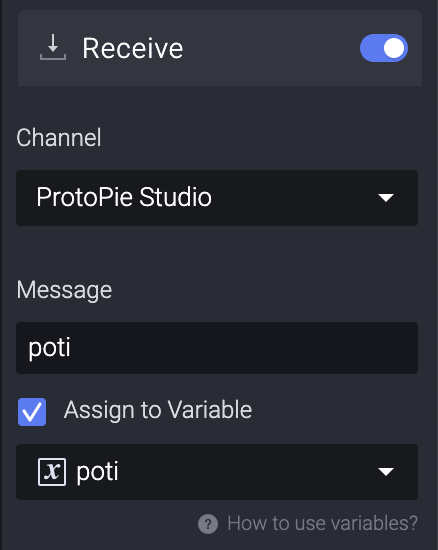
- Use “Receive” as a new trigger
- Select “ProtoPie Studio” as the channel
- Enter the message exactly as configured in blokdots
- 💡 Tip: Create a variable in your Pie and use the Assign to Variable feature. Blokdots will try to attach a value for your input component and the value will then be assigned to the variable in your Pie.
- Continue with defining the triggered responses in ProtoPie Studio
#Code Export
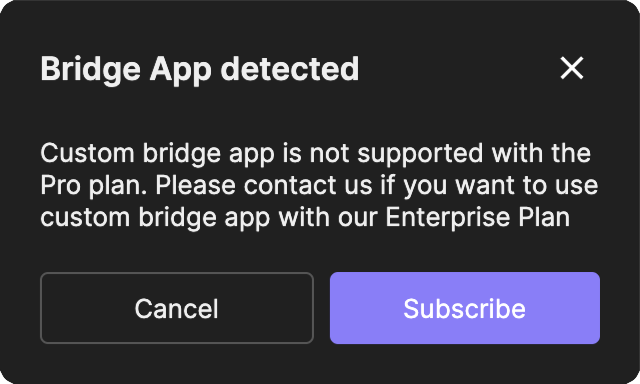
When you export a blokdots project to Javascript code, you're effectively creating a "Bridge App" for ProtoPie Connect. Please be aware that "Bridge Apps" are only supported on the ProtoPie Enterprise Plan.
If you're on the Pro Plan, you'll see a pop up informing you that a "Bridge App" has been detected and that an upgrade to ProtoPie Enterprise is needed for this to work.