
The Story of blokdots
HfG Schwäbisch Gmünd
In 2013 I started studying industrial design at HfG Schwäbisch Gmünd. The university also has a really good interaction design program. As I have also always been fascinated by technology and coding, I have been interested in the contents of the interaction design classes. Many of my friends were students from this program and I also learned a lot about it from them — amongst them, Christoph.
Eventually, I decided to do extracurricular studies in interaction design and learn more about designing interfaces. I already often included physical computing and Arduino in my industrial design projects to make the prototypes more ‘real.’ Along with me, more industrial design students wanted to make their projects more believable and included hardware components in their prototypes. After all, Arduino is a very approachable and relatively simple toolkit, enabling anyone to materialize their ideas.
Being the only industrial designer in some interaction design courses, fellow industrial design students felt comfortable enough to ask me for help with their Arduino code. The problems were relatively simple, for someone who already has some coding experience — like getting an LED to pulsate if a button is pressed — but again, for an absolute beginner in code, even the simple Arduino IDE is a big hurdle, especially when it comes close to the deadline of projects and time is running out.
Interaction design students, on the other hand, had some coding and physical computing classes, but they often had a lot of respect for working with electricity or tools like a soldering iron. A few of them approached me too and asked me if I could help them to solder their circuit. Also here, this is a relatively small problem, but a big hurdle for someone who is not used to working with tools.
The thesis
When it came to my bachelor thesis, I wanted to bridge this gap and enable industrial and interaction design students to create interactive physical prototypes more easily and quickly.
The project involved two big problems to solve: (1) making hardware easy to use without the hassle of using a breadboard or soldering, and (2) creating the logic between them as easily as possible to prevent the need to write code. There have been a lot of similar projects already out there, like LEGO Mindstorms, LittleBits, or Project Bloks. Most of them were targeted towards education. My thesis, however, should target professionals. The outcome has been a hardware toolkit and an app.
Like most other toolkits, mine included plug-and-play hardware components, but reduced to the bare minimum, so that they would fit into intricate prototypes. Along with the components, I designed two logic bricks that included the microcontrollers. One of the bricks was designed to directly control actuators and test components even without coding. The second brick would be able to be programmed with logic, like an Arduino. The components were connected with an AUX cable to the bricks — like connecting a phone to a speaker. These cables are commonly available and one cannot make a mistake plugging them in.
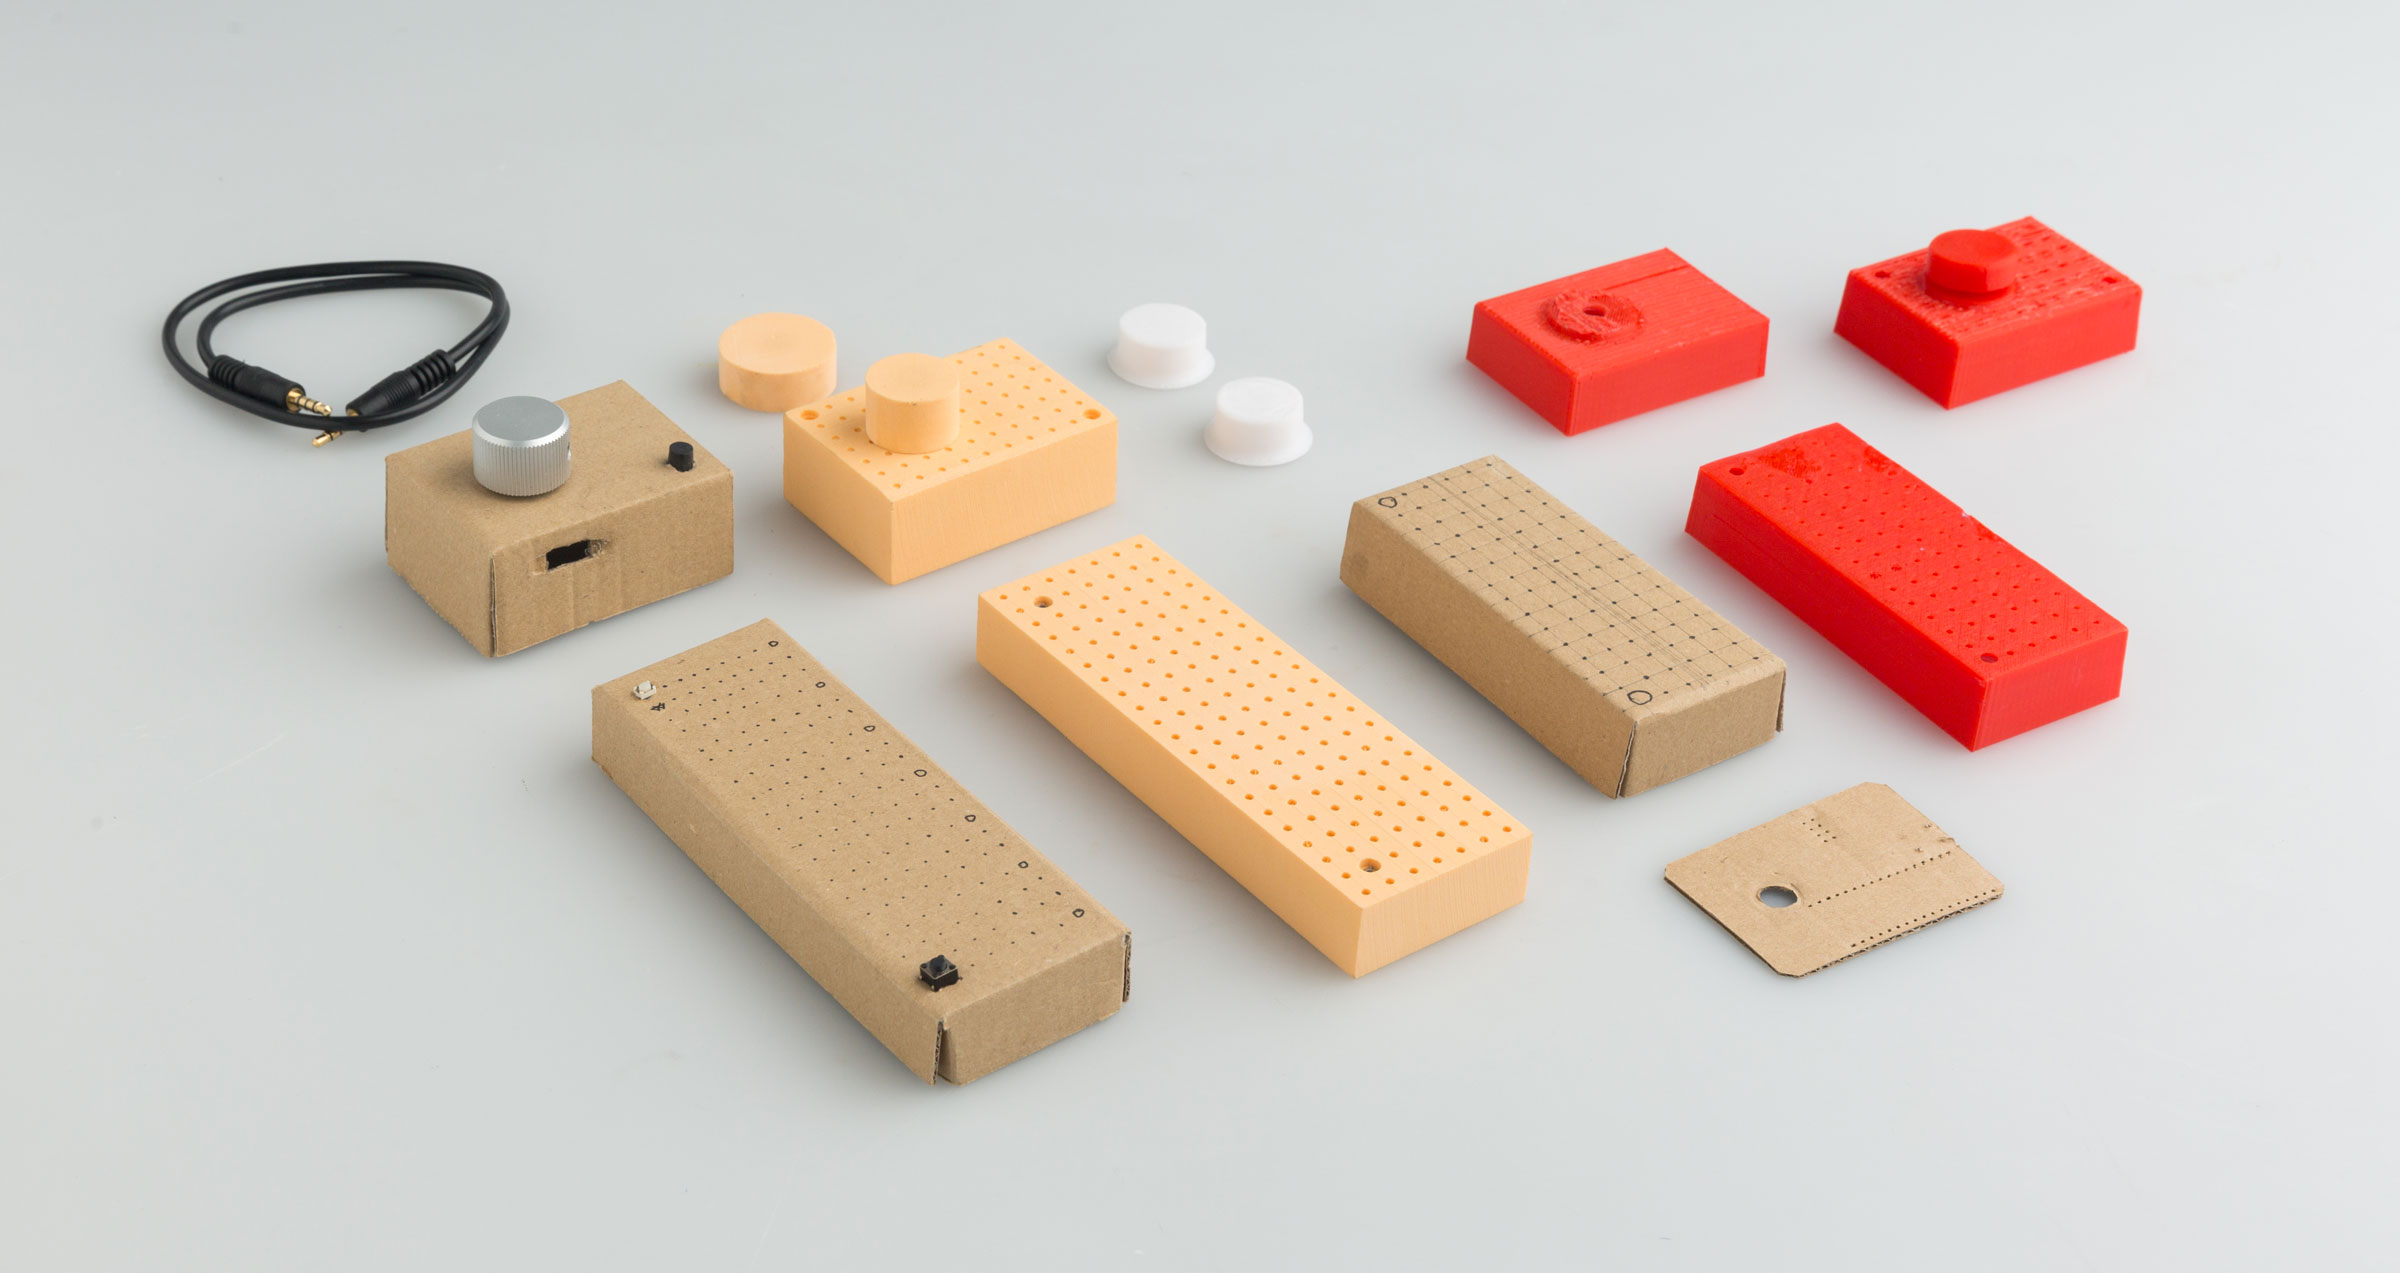 The physical design models of the bricks.
This brings us to the second main aspect of the project: the application. I needed to find a system that was easy enough to understand for beginners without being too ‘childish.’ I had a look at a lot of different programming interfaces like Scratch or node-based systems, but they quickly turned out to be confusing when creating more complex prototypes. So, I decided to keep the connections small and consistent. The approach for that was to use the “if this, then that” logic structure. Small sentences to create the connections between input and output.
After having created these concepts, I created a small working workflow in a prototype, with working PCBs on top of Arduino boards, and a small Electron app that would display the use and flow.1
 The full concept with the apps and the bricks.
I got a lot of recognition for my work at my school and in my personal environment — It even received a Core77 award — and was encouraged to pursue the project further.
Creating a product
Having graduated, I decided to follow these suggestions and make blokdots real. While working on developing the software and trying to find solutions to produce the hardware, I also promoted the concept to find potential users. I held presentations at different design consultancies, talked to other prototyping tools like Framer or Figma, and tried to get investment to fund the project.
After a couple of months, I had to realize two things: Producing hardware on the one hand is complicated and expensive, and on the other hand, my coding skills were not sophisticated enough.2 I discovered the Grove toolkit by Seeed Studio and shifted towards that to build upon existing hardware. To improve my code, I asked Christoph for feedback. Instead of only giving me feedback, he rewrote three months' worth of my code in a more robust and smart way — only within one weekend!
We both worked on blokdots next to our full-time jobs. Over the years, we consistently increased its features, implemented more components, and improved the code. During this time, I often asked Marcus for advice, who was my colleague at IDEO at the time. He helped us so much that eventually, he could not deny anymore that he was also part of the team. Since he joined, we have a lot more structure in what we should focus on.
Blokdots today
Today, six years since the start of the thesis in March 2017, blokdots is still constantly developing. While it started off as a hardware toolkit, it now has become a hardware prototyping software. We learned a lot on this journey already, but it is far from over!
We have just released blokdots 2.0 and rebuilt the app basically from scratch and intend to improve it even more.
We want blokdots to be as easy to use as tools like Figma, but for hardware. It aims to support our users’ workflows in the best way possible — might it be to simply sketch a first interactive draft, or to create a high-fidelity connected prototype.
While blokdots might has changed considerably since the thesis project, it still has its original goal at its core: to make hardware prototyping easy for everyone.


