
Tangible Experience Design Course 2023
Prototyping Design with blokdots
A class experience on Tangible User Interface Design. A course by Serena Cangiano and Fabian Frei.
Participants: Kamonwan Wanaklang, Grace Wu, Alexei Karpuhin, Shen Tonghua, Sofiia Kaminska, Chang Jiaqi, Zhang Yujing, Karel Adaimi, Melisa Güda, Gaia Paris, Ida Riegel, Amin Sharq
On the 27th and 28th of November 2023, a class of 14 students gathered at HSLU Master Design in Lucerne, Switzerland, to delve into the realms of Tangible Experience Design and prototyping techniques. The course is structured in a series of theoretical and methodological lectures and hands-on exercises, where the students encounter a prototyping driven design process based on iterations and presentations.
During the first day the students were invited to analyze their interactions with everyday objects, leading them to reimagine conventional switches and contemplate the creation of innovative user experiences. On the second day, we delved into the intricacies of high-fidelity prototyping using blokdots. This article serves as a comprehensive summary of our enlightening journey during these two days.
Prototyping has been placed at the center of the exploration and ideation activities to validate the opportunity to apply different design approaches based on the creative use of technology.
The students have been divided into groups: some groups worked on the development of iteration to demonstrate the concept of a lamp providing health information; some others explored ideas of possible devices providing access to health data. The following is a documentation of their journey that involved the use of blokdots as the main platform for prototyping.
Prototype 1: Breath Work Lamp
by Grace Wu & Sofiia Kaminska
Workflow: ideation through prototyping
The workshop focused on creating a lamp prototype using Arduino boards to aid in a calming breathing technique called “square breathing”. We used blokdots software to program the lamp’s interaction with a button and timer simulator, creating a synchronized breathing experience.
The process involved:
- Inspiration: We drew from “square breathing” for the lamp’s design, aiming to help users relax through synchronized breathing patterns.
- Technology integration: Arduino boards formed the prototype’s core, allowing us to code interactions between the lamp and the breathing exercise. blokdots software facilitated the programming.
- Components: We integrated a button to trigger the breathing exercise and a timer simulator to manage intervals, ensuring a structured experience.
- Interface Design: Figma helped create a phone screen interface, enabling users to visualize and follow the breathing exercise.
The workshop showcased the fusion of hardware, software, and simulated interfaces to create a tangible product for health improvement. It highlighted the importance of user-centric design and technology in wellness solutions, as well as collaborative learning and creativity in a diverse group setting.
What could be improved from this prototype:
- Camouflage the phone within a box-like structure, seamlessly integrating it into the lamp design.
- Consider a square-shaped lamp design to visually reflect the box breathing exercise concept.
- Enhance user experience by incorporating sound and haptic feedback; for instance, a vibration signal at the end of each box breathing phase, allowing users to remain focused without needing to visually check the interface during meditation.
Prototype 2: Sound Indicator
by Melisa Güda

Building my sound indicator with Arduino was quite a journey! I wanted it to show “SOUND OK” in green when things are quiet and switch to “SOUND DANGEROUS” in red when it gets too loud. But then I thought, what if I’m not always looking at it? So, I added a Buzzer Warning.
The user-friendly interface allowed for an easy integration of tangible elements into the design process. The visual nature of blokdots made it easy to work with, even for someone like me who wasn’t previously familiar with it.
Here’s what I figured out: First off, I might not always see the indicator. Life gets busy! So, I added a Buzzer Warning that beeps for three minutes when it’s too noisy. This way, even if I’m not looking, I’ll definitely hear it. I chose three minutes because it’s long enough to grab my attention, but not so long that it becomes annoying. I also realized that the buzzer can be used in different ways. For example, in big factories where there’s a lot of noise, it could be set up to sound an alarm. This would help workers know when it’s too loud and they need to protect their ears.
Making my prototype adaptable was important. I wanted it to be useful in different places, like homes or workplaces. So, I made sure I can change the buzzer to play different sounds – maybe a nice tune or whatever fits the situation. I also think it could be improved further with indicators that show what created the noise and intermediate levels, also a “silence” level, where there is no noise at all.
In a nutshell, I learned that adding sound to my indicator makes it even better. It’s not just about what I see; it’s also about what I hear. And by making it adaptable, I can use it in lots of different places to keep myself safe from loud noises.
Prototype 3: Sereniglow
by Gaia Paris, Amin Sharq and Shen Tonghua
Workflow: ideation through prototyping
Prototyping a smart charging station with blokdots was incredibly intuitive, straightforward, and swift. Within a matter of minutes, we could explore various solutions for our output, ultimately selecting the one that best embodied our concept.
Components:
- Arduino Uno
- Grove-LCD RGB Backlight
- Button
- Rotary Angle Sensor

Prototyping:
Sereniglow is a charging station designed to sync with your schedule, foresee stressful moments through the use of keywords (by instance “urgent” or “very important” etc.), and enhance your well-being by preventing a luminous signal, and, just after, making a comfortable environment to relax just before the stressful moment happens, through calming light and music. This concept evolved during a collaborative feedback session with peers and teachers. The backlight button with the cold and bright light as output, signals upcoming stress, while the RAS activates the calming mode, with warm and diffuse light.
Some of us had some previous experiences with Arduino and we found the tool very intriguing, especially in the context of rapid prototyping or as an integration into usual practices.
Our suggestion is to enhance the user experience with brief tutorials, akin to Adobe or Shapr 3D, demonstrating for example sensors’ functionality (or others) in concise 3-4 second videos. It would be interesting, in the future, to enable the user to intervene directly on the generated code.
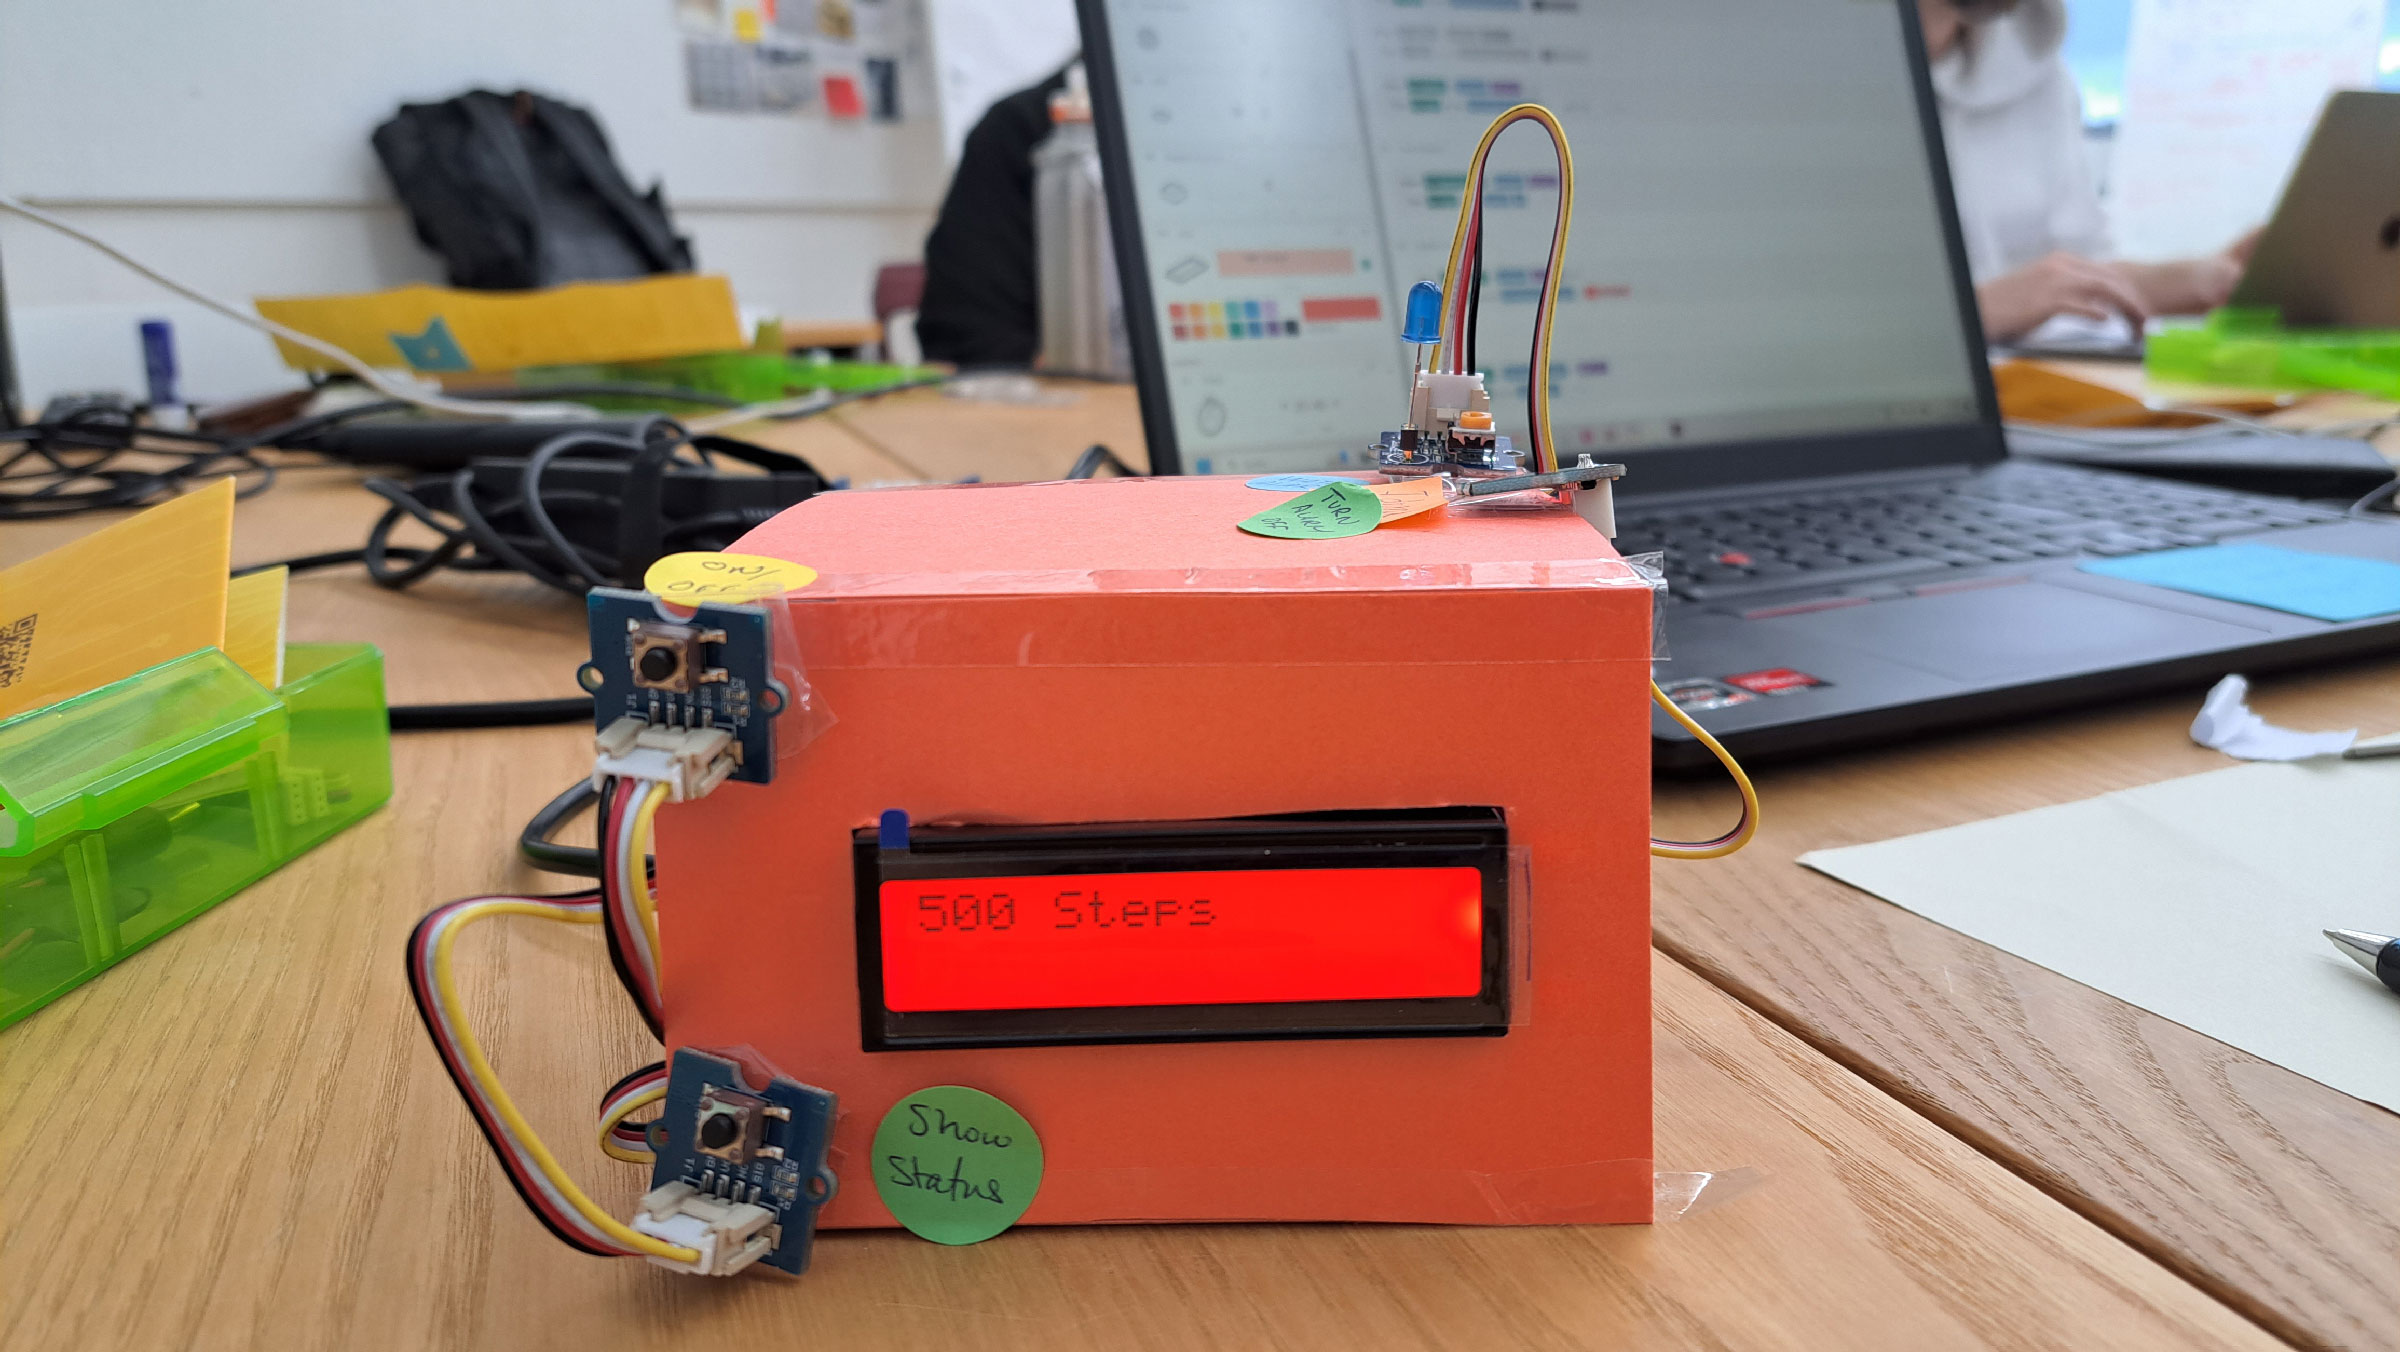
Prototype 4: HealthFusion
by Karel Adaimi and Anastasiia Herrmann
Workflow: Exploration through prototyping
The lamp is a tool that could also display health data, such as steps you take throughout the day and a reminder that you need to drink water every hour. The lamp also allows you to set a goal of how many steps per day you want to achieve. Firstly, the lamp works as a normal lamp which you turn on by pressing the ON/OFF button once and holding the button for 2 seconds. The front display is the LCD monitor where you turn the light on and off but also displays the steps you make throughout the day. If you want to see your status, whether you achieved your goal yet or not, you can press the “show status” button on the lamp.
After pushing the button, the color of the lamp graduates from red (where you have not achieved your goal) to green (where you have achieved your goal). The lamp also has a blue light that acts as a water alarm. It switches on once every hour to remind you to drink water. Once you drank water, you use the touch button to switch it off. Potentially, the lamp could display more health information.
I never worked with blokdots nor used Arduino before. It was enjoyable trying out the buttons giving different commands to it and like working with physical prototyping in such a way.
If we had more time, we would visualize the functions of the lamp device better. We could use the phone or a bigger monitor that could better display information needed instead of a small LCD monitor. And prototype the placement of buttons and the look of the lamp. This lamp could also be connected with the health app on your phone to get the information about your health. In addition, with more time we could have prototyped more to show the color change and other details needed.
Lamp is switched on.
 Lamp status shows you have not achieved your goal.
 Lamp status shows you achieved your goal.
 Water light alarm on and a touch button to turn off.


